Queues im OTOBO Ticketsystem
This content is not available in your language yet.
Queues im OTOBO Ticketsystem
Abschnitt betitelt „Queues im OTOBO Ticketsystem“Die Verwaltung von Warteschlangen ist ein zentrales Element in OTOBO, dem führenden Open-Source-Ticket-System, das Teams hilft, ihre Arbeitslast effizient zu organisieren und zu verwalten. Durch eine klare Struktur in Warteschlangen können Arbeitselemente basierend auf verschiedenen Kriterien, wie Fähigkeitsniveau, Sicherheitsstufe und Verantwortungsbereich, optimal zugewiesen werden. In diesem Leitfaden finden Sie detaillierte Informationen zur Einrichtung und Verwaltung von Warteschlangen in OTOBO, zur Optimierung Ihres Workflows und zur Sicherstellung einer effektiven Ticketbearbeitung.
Überblick
Abschnitt betitelt „Überblick“OTOBO ermöglicht es, über Warteschlangen Arbeitselemente effektiv zu ordnen und Teams Struktur zu geben. In jeder frischen OTOBO-Installation finden sich vier vordefinierte Warteschlangen: Raw, Junk, Misc und Postmaster. Diese dienen verschiedenen Zwecken, wie der Sammlung aller eingehenden Nachrichten in Raw, wenn keine Filterregeln gesetzt sind, oder der Ablage von Spam in Junk. Das Modul Warteschlangen unter den Ticketeinstellungen ermöglicht es Admins, Warteschlangen nach Bedarf zu bearbeiten oder neu hinzuzufügen.
Verwalten von Warteschlangen
Abschnitt betitelt „Verwalten von Warteschlangen“Neue Queue hinzuzufügen
Abschnitt betitelt „Neue Queue hinzuzufügen“- Wählen Sie Queue hinzufügen in der linken Seitenleiste.
- Füllen Sie die notwendigen Felder aus.
- Bestätigen Sie mit Speichern.
![Dialog zum Hinzufügen einer Warteschlange [1]](https://softoft.sirv.com/Images/otobo/docs/queue-add)
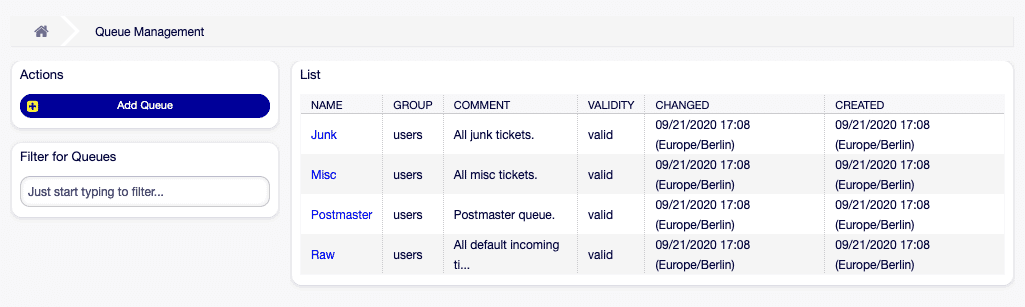
Bearbeitung existierender Warteschlangen
Abschnitt betitelt „Bearbeitung existierender Warteschlangen“- Wählen Sie die gewünschte Warteschlange aus der Übersicht.
- Nehmen Sie Änderungen an den Feldern vor.
- Klicken Sie auf Speichern oder Speichern und Schließen.
![Dialog zur Bearbeitung der Warteschlange [1]](https://softoft.sirv.com/Images/otobo/docs/queue-edit)
Hinweise und Tipps
Abschnitt betitelt „Hinweise und Tipps“::: info Warteschlangen können nicht komplett aus OTOBO/Znuny entfernt werden, sondern lediglich durch das Setzen der_Gültigkeit_ auf ungültig oder vorübergehend ungültig deaktiviert werden. :::
::: tip Nutzen Sie das Filterfeld, um schnell eine spezifische Queuey zu finden, indem Sie den Namen eingeben. :::
::: info Bei einer Änderung des Warteschlangennamens, der in der Systemkonfiguration verwendet wird, führt eine Validierungsprüfung durch und warnt entsprechend. Es stehen mehrere Optionen zur Verfügung, um mit der Änderung weiterzuverfahren. :::
![Dialog zur Validierung der Warteschlange [1]](https://softoft.sirv.com/Images/otobo/docs/queue-system-config-validation)
Einstellungen für Warteschlangen
Abschnitt betitelt „Einstellungen für Warteschlangen“Die Einstellungsmöglichkeiten für Queues umfassen unter anderem:
- Name: Der eindeutige Name der Warteschlange.
- UnterQueue von: Hier kann die neue Queue einer bestehenden Queue als Unterwarteschlange zugeordnet werden.
Durch die effektive Nutzung von Warteschlangen im OTOBO Ticket-System können Unternehmen die Bearbeitung von Kundenanfragen und internen Aufgaben maßgeblich verbessern. Eine sorgfältige Konfiguration und Verwaltung von Warteschlangen unterstützt Teams dabei, geordnet und effizient zu arbeiten.
Fortgeschrittene Warteschlangeneinstellungen
Abschnitt betitelt „Fortgeschrittene Warteschlangeneinstellungen“Die effektive Konfiguration von Ticket-Warteschlangen ist entscheidend für ein reibungsloses Ticketmanagement in OTOBO. Mit den folgenden Einstellungen kann die Bearbeitungszeit von Tickets optimiert und ein höheres Maß an Kundenzufriedenheit erreicht werden.
Automatische Queue mit AI Klassifizierung
Abschnitt betitelt „Automatische Queue mit AI Klassifizierung“Mit der AI Klassifizierung können Tickets automatisch in die richtige Queue eingestuft werden. Dies spart Zeit und Ressourcen und sorgt für eine schnellere Bearbeitung der Anfragen. Weitere Informationen finden Sie hier: OTOBO AI Ticket Klassifizierung
Zugriffssteuerung und Bearbeitungsfristen
Abschnitt betitelt „Zugriffssteuerung und Bearbeitungsfristen“- Gruppe: Hierdurch wird der Zugang zu einer Queue auf spezifische Gruppen beschränkt, was eine Berührungsebene zwischen Warteschlangen und Benutzerrollen (Agenten oder Kunden) herstellt.
- Entsperrzeit in Minuten: Definiert die Dauer, nach der ein gesperrtes Ticket automatisch freigegeben wird. Ein Wert von 0 bedeutet, dass die Sperre bestehen bleibt, bis diese manuell aufgehoben wird.
Eskalationsmanagement
Abschnitt betitelt „Eskalationsmanagement“- Eskalation - Erste Reaktionszeit (Minuten): Setzt einen Zeitrahmen für die erste Reaktion des Agenten auf ein Ticket. Es ist zu beachten, dass diese Zeitvorgabe für E-Mails oder Anrufe, die vom Agenten initiiert wurden, nicht aktiviert wird.
- Eskalation - Aktualisierungszeit (Minuten) und Eskalation - Lösungszeit (Minuten): Diese Felder bestimmen die Zeitfenster für die Aufrechterhaltung der Kommunikation mit dem Kundenund für die Problemlösung. Hinweis: Die Lösungszeit wird nicht zurückgesetzt, wenn ein Ticket erneut geöffnet wird.
Benachrichtigungseinstellungen
Abschnitt betitelt „Benachrichtigungseinstellungen“- Benachrichtigen durch: Ermöglicht die Einstellung von Benachrichtigungen, basierend auf dem Fortschritt der Eskalationszeit (angegeben in Prozent), um sowohl Agenten als auch Kunden proaktiv zu informieren.
Handling von Nachverfolgungen
Abschnitt betitelt „Handling von Nachverfolgungen“- Option für Nachverfolgung: Bestimmt das Vorgehen bei Kundenreaktionen auf bereits geschlossene Tickets. Optionen umfassen das Erstellen eines neuen Tickets, das Wiedereröffnen des vorherigen Tickets oder das Ablehnen der Nachverfolgung.
- Ticket sperren nach einer Nachverfolgung: Wenn die Wiedereröffnung eines Tickets möglich ist, kann diese Option das Ticket für den letzten Bearbeiter sperren, um eine kontinuierliche Betreuung zu gewährleisten.
Weitere individuelle Einstellungen für Warteschlangen
Abschnitt betitelt „Weitere individuelle Einstellungen für Warteschlangen“- Systemadresse: Legt die Absenderidentität für E-Mails aus dieser Queue fest.
- Standard-Signaturschlüssel: Wird aktiv, sofern Sicherheitsschlüssel oder -zertifikate konfiguriert sind, und wählt den Standard-Schlüssel für E-Mail-Signaturen.
- Anrede und Signatur: Für ausgehende Kommunikation wählbare, vordefinierte Elemente.
- Kalender: Bestimmt die Arbeitszeiten, basierend auf den im System definierten Kalendern.
- Gültigkeit: Eine zentrale Einstellung, die bestimmt, ob die Queue aktiv ist.
- Kommentar: Dient der Erklärung und kann zusätzliche Informationen oder Richtlinien für die Nutzung der Warteschlange enthalten.
Jede Änderung dieser Einstellungen kann die Ticketbearbeitung erheblich beeinflussen. Daher sollte die Konfiguration sorgfältig geplant und regelmäßig überprüft werden, um sicherzustellen, dass das Ticket-System effizient und kundenfreundlich funktioniert. Die detaillierte Kenntnis und geschickte Anwendung dieser Einstellungen sind Schlüsselfaktoren für den Erfolg eines jeden Support-Teams, das OTOBO nutzt.
Ticket Queue Übersicht
Abschnitt betitelt „Ticket Queue Übersicht“Im Dashboard des OTOBO Ticketsystems befindet sich die Ticket Queue Übersicht.
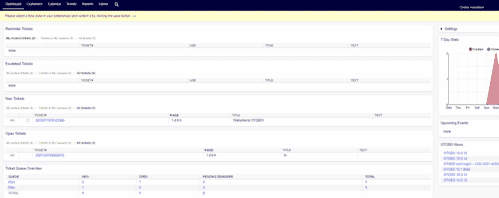
OTOBO Dashboard
In der Ticket Queue Übersicht, wird in einer Tabelle angezeigt, wie viele Tickets sich in einer bestimmten Queue in einem gewissen Status befinden.
Dashboard Settings
Abschnitt betitelt „Dashboard Settings“Jeder Agent hat die Möglichkeit das Dashboard nach den eigenen Vorstellungen einzustellen.
Man kann die Ticket Übersicht ausblenden, in denen man in die Einstellungen vom Dashboard geht.

OTOBO Dashboard-Settings
Ticket-Übersicht Einstellungen
Abschnitt betitelt „Ticket-Übersicht Einstellungen“In den [Systemkonfigurationen können Änderungen an der Ticket-Queue Übersicht vorgenommen werden
Dafür muss man die Einstellung DashboardBackend###0270-TicketQueueOverview verändern.
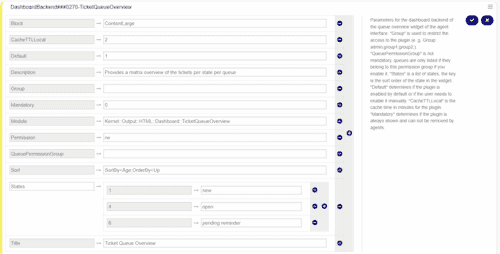
DashboardBackend###0270-TicketQueueOverview
Um einzustellen, dass ein Status nicht mehr in der Übersicht angezeigt werden soll, muss dieser beim Punkt States entfernt werden durch klicken des Minus Zeichens.
Neuen Status zur Ticket Queue Ansicht hinzufügen
Abschnitt betitelt „Neuen Status zur Ticket Queue Ansicht hinzufügen“Damit ein neu angelegter Status auch in der Ticket-Queue Overview angezeigt wird muss dieser mit dem + Zeichen bei States hinzugefügt werden.
Die Nummern geben die Position, bzw. Reihenfolge der Stati in der Ticket- Übersicht an.
Kommunikation mit Automatischen Antworten
Abschnitt betitelt „Kommunikation mit Automatischen Antworten“Automatische Antworten sind ein wesentliches Werkzeug im Kundenservice, um schnell und effektiv auf Kundenanfragen zu reagieren. In OTOBO, dem fortschrittlichen Ticket-System, bieten automatische Antworten eine unmittelbare Rückmeldung an Kunden und informieren sie darüber, dass ihre Anfrage empfangen wurde und bearbeitet wird. Diese Funktion ist besonders wertvoll, da sie die Erwartungen der Kundenvon Beginn an managt und zur Steigerung der Kundenzufriedenheit beiträgt.
Integration des Chat-Kanals für eine verbesserte Kommunikation
Abschnitt betitelt „Integration des Chat-Kanals für eine verbesserte Kommunikation“- Chat-Kanal: Ein spezifischer Chat-Kanal kann für die Kommunikation in Verbindung mit den in dieser Warteschlange eingehenden Tickets festgelegt werden. Diese Integration ermöglicht eine nahtlose Verbindung mit Kundenin Echtzeit und erweitert die Kommunikationsmöglichkeiten innerhalb des Systems.
![Bildschirm zur Verwaltung automatischer Antworten [1]](https://softoft.sirv.com/Images/otobo/docs/auto-response-management)
::: tip Automatische Antworten setzen eine gültige Systemadresse voraus. Systemadressen werden im Bereich für E-Mail-Adressen ( Kommunikation und Benachrichtigungen) konfiguriert. :::
Hinzufügen einer automatischen Antwort
Abschnitt betitelt „Hinzufügen einer automatischen Antwort“- Wählen Sie Auto Antwort hinzufügen in der linken Seitenleiste.
- Füllen Sie alle erforderlichen Felder aus.
- Klicken Sie auf Speichern, um die Einstellungen zu übernehmen.
![Bildschirm zum Hinzufügen einer automatischen Antwort [1]](https://softoft.sirv.com/Images/otobo/docs/auto-response-add)
Bearbeiten einer automatischen Antwort:
Abschnitt betitelt „Bearbeiten einer automatischen Antwort:“- Selektieren Sie eine automatische Antwort aus der Übersicht.
- Passen Sie die Felder nach Bedarf an.
- Bestätigen Sie die Änderungen mit Speichern oder Speichern und fertig.
![Bildschirm zur Bearbeitung einer automatischen Antwort [1]](https://softoft.sirv.com/Images/otobo/docs/auto-response-edit)
::: info Automatische Antworten können nicht gelöscht, sondern nur durch Anpassung der Gültigkeit deaktiviert werden. :::
Schlüsseleinstellungen für Automatische Antworten
Abschnitt betitelt „Schlüsseleinstellungen für Automatische Antworten“- Name: Eindeutiger Identifikator der automatischen Antwort.
- Betreff: Der vorgegebene Betreff der E-Mail, die versendet wird.
- Antwort: Inhaltliche Gestaltung der automatischen Antwort.
- Typ: Bestimmt das Ereignis, welches das Senden der automatischen Antwort auslöst. Wichtig ist hier die Unterscheidung zwischen Antworten auf Nachfolgeanfragen und automatischen Antworten auf neue Tickets.
Das effiziente Management von automatischen Antworten trägt erheblich zur Optimierung des Kundenservices bei. Durch den Einsatz dieser Funktion in OTOBO kann die Reaktionszeit auf Kundenanfragen drastisch reduziert und ein positiver, professioneller Ersteindruck hinterlassen werden.
Beziehung zwischen Queues und Automatischen Antworten
Abschnitt betitelt „Beziehung zwischen Queues und Automatischen Antworten“In OTOBO ermöglicht die Strukturierung von Warteschlangen in Kombination mit automatischen Antworten eine klare und effiziente Kommunikation mit den Kunden. Diese Kombination sichert eine sofortige und korrekte Benachrichtigung des Kunden über relevante Serviceinformationen oder Änderungen, die umgehend kommuniziert werden müssen. OTOBO bietet hier die Flexibilität, automatische Antworten spezifisch einzelnen Warteschlangen zuzuordnen.
Ereignistypen und Absenderkonfiguration
Abschnitt betitelt „Ereignistypen und Absenderkonfiguration“Automatische Antworten werden basierend auf Ereignissen ausgelöst, die in OTOBO wie folgt definiert sind:
- auto reject: Stößt eine automatische Antwort an, wenn einem Kundendas Verfolgen eines geschlossenen Tickets untersagt wird.
- auto remove: Wird versendet, sobald ein Ticket aus dem System entfernt wird.
- auto reply: Generiert eine sofortige Antwort bei Erstellung eines neuen Tickets. Abhängig von der Systemkonfiguration kann dies auch für Tickets gelten, die über das Kunden-Webinterface oder telefonisch eingereicht werden.
- auto reply/new ticket: Informiert den Kundenüber die Zuweisung einer neuen Ticketnummer, falls die ursprüngliche Anfrage zu einem neuen Ticket führt.
Die effektive Nutzung dieser Antworten beginnt mit der Definition der Absender-E-Mail-Adresse und der Gültigkeit der automatischen Antwort, um sicherzustellen, dass nur aktivierte und relevante Kommunikationsströme mit Kunden interagieren.
Flexible Nachrichten mit Variablen
Abschnitt betitelt „Flexible Nachrichten mit Variablen“Um sicherzustellen, dass die Mitteilungen persönlich und relevant sind, unterstützt OTOBO die Verwendung von
Variablen (
oder Tags) in den Nachrichtentexten. Ein Beispiel hierfür ist <OTOBO_TICKET_TicketNumber>, das sich auf die
spezifische Ticketnummer erweitert, wodurch effektiv eine Individualisierung
der Kommunikation erreicht wird.
![Variablen für automatische Antworten [1]](https://softoft.sirv.com/Images/otobo/docs/auto-response-variables)
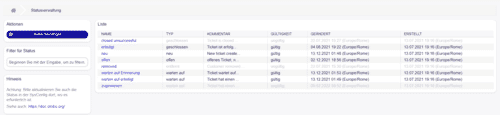
Zuordnung der Antworten an Warteschlangen
Abschnitt betitelt „Zuordnung der Antworten an Warteschlangen“Zum Verknüpfen einer oder mehrerer automatischer Antworten mit bestimmten Warteschlangen dient der Modulbereich Warteschlangen ↔ Automatische Antworten. Dies ermöglicht eine detaillierte Steuerung darüber, welche Informationen Kunden erhalten, basierend auf dem Ursprung oder Typ ihrer Anfrage.
![Verwaltung zwischen Warteschlangen und automatischen Antworten [1]](https://softoft.sirv.com/Images/otobo/docs/auto-response-queue-management)
Das effektive Management dieser Beziehungen hilft, die Konsistenz in der Kundenkommunikation zu bewahren und sicherzustellen, dass Kunden stets die relevantesten Informationen erhalten. Zwischen Warteschlangen und automatischen Antworten zu verwalten, bildet somit einen wichtigen Pfeiler für ein ausgezeichnetes Serviceerlebnis. Um eine solche Zuordnung vorzunehmen, sind nur wenige Schritte notwendig, und die flexible Konfiguration in OTOBO bietet zahlreiche Möglichkeiten zur Optimierung der Kundenkommunikation.
Warteschlangen ↔ Automatische Antworten
Abschnitt betitelt „Warteschlangen ↔ Automatische Antworten“Die Zuweisung automatischer Antworten an spezifische Warteschlangen ist ein entscheidender Schritt, um sicherzustellen, dass Kunden die passenden und notwendigen Informationen auf effiziente Weise erhalten. In OTOBO lässt sich dieser Schritt unkompliziert durchführen und trägt maßgeblich zur Kundenzufriedenheit und Effizienz im Ticketmanagement-System bei.
Schritte zur Zuweisung Automatischer Antworten auf Warteschlangen
Abschnitt betitelt „Schritte zur Zuweisung Automatischer Antworten auf Warteschlangen“- Wählen Sie die gewünschte Warteschlange aus der Spalte Warteschlangen.
- Markieren Sie die automatischen Antworten, die dieser spezifischen Warteschlange zugeordnet werden sollen.
- Bestätigen Sie die Zuweisung durch Klicken auf Speichern oder Speichern und fertig.
![Bildschirm zur Zuweisung von automatischen Antworten an Warteschlangen [1]](https://softoft.sirv.com/Images/otobo/docs/auto-response-queue-queue)
::: info Es ist nicht direkt möglich, mehrere Warteschlangen gleichzeitig einer automatischen Antwort zuzuweisen. Eine Änderung der Zuweisung erfolgt primär durch Selektion aus der Warteschlangenansicht. :::
Optimale Verwendung der Einstellungen
Abschnitt betitelt „Optimale Verwendung der Einstellungen“Die Einstellungen für die Zuweisung automatischer Antworten zu Warteschlangen ermöglichen eine differenzierte Reaktion auf verschiedene Kundenszenarien:
- auto reply: Ist die Standardreaktion bei Anfragen, die als ein neues, nicht nachverfolgbares Ticket behandelt werden.
- auto reject: Entspricht der Antwort auf versuchte Nachverfolgungen, die auf Grund der Warteschlangeneinstellung ablehnen nicht zulässig sind.
- auto follow up: Wird aktiv bei Anfragen, die eine Weiterverfolgung vorhandener Tickets ermöglichen.
- auto reply/new ticket: Die Zuweisung erfolgt, wenn ein Nachverfolgungsversuch in der Erstellung eines neuen Tickets resultiert.
- auto remove: Tritt in Kraft, wenn ein Ticket aus dem System entfernt wird.
Bitte beachten Sie, dass sich auto reply, auto reject und auto reply/neues Ticket gegenseitig ausschließen, entsprechend den Einstellungen der jeweiligen Warteschlange. Hier wird mit Bedacht entschieden, welche automatische Antwort die adäquate Rückmeldung für das eingetretene Ereignis darstellt.
Schlussfolgerung
Abschnitt betitelt „Schlussfolgerung“Die genaue Konfiguration der Verbindung zwischen Warteschlangen und automatischen Antworten in OTOBO ist essenziell, um eine effiziente und klare Kommunikation mit Kunden zu gewährleisten. Durch die intelligente Zuweisung dieser Elemente sorgen Sie dafür, dass Ihre Kunden zeitnah und sachgerecht über den Stand ihrer Anfragen informiert werden. Eine strategisch durchdachte Einrichtung trägt somit signifikant zu einem gelungenen Kundenservice bei.
Queues mit Statistiken auswerten
Abschnitt betitelt „Queues mit Statistiken auswerten“Man kann die Daten aus den Warteschlangen in OTOBO mit Statistiken auswerten. Dafür gibt es die Möglichkeit, neue Statistiken zu erstellen, um beispielsweise zu analysieren, wie viele Tickets in einer bestimmten Queue in der letzten Woche erstellt wurden. Hier finden Sie weitere Informationen zur Erstellung von Statistiken in OTOBO.