
Install OTOBO on RHEL with Docker Compose
This guide describes the full installation of OTOBO on Red Hat Enterprise Linux (RHEL) using Docker and Docker Compose. The official otobo-docker stack bundles every required service (web server, database, Elasticsearch, Redis and optionally Nginx for HTTPS), so you can have OTOBO up and running within minutes.
Supported RHEL versions
Section titled “Supported RHEL versions”- RHEL 8
- RHEL 9
System requirements
Section titled “System requirements”| Component | Minimum | Recommended (production) |
|---|---|---|
| CPU | 2 cores | 4+ cores |
| RAM | 4 GB | 8 GB or more |
| Disk | 20 GB free | 40 GB+ (SSD) |
| Docker | 19.03.13 | latest version |
| Docker Compose | v2 | latest version |
| Git | 2.17 | latest version |
[!NOTE] Elasticsearch is part of the stack and requires a fair amount of memory. For production environments, plan for at least 8 GB of RAM.
Step 1: Install Docker, Docker Compose and Git
Section titled “Step 1: Install Docker, Docker Compose and Git”On RHEL, Docker is installed from the official Docker CE repository (the docker package from the standard repos is outdated or unavailable). First set up the repository:
sudo dnf install -y dnf-plugins-core gitsudo dnf config-manager --add-repo https://download.docker.com/linux/rhel/docker-ce.repoThen install Docker Engine, the CLI and the Compose plugin:
sudo dnf install -y docker-ce docker-ce-cli containerd.io docker-compose-pluginEnable and start the Docker service so it launches automatically on boot:
sudo systemctl enable --now dockerOptional: add your user to the docker group so you can run Docker commands without sudo (log out and back in afterwards):
sudo usermod -aG docker $USERVerify the installation:
docker --versiondocker compose versionStep 2: Clone the OTOBO Docker repository
Section titled “Step 2: Clone the OTOBO Docker repository”The otobo-docker repository contains the Docker Compose configuration and helper scripts. Use the tag that matches the OTOBO version you want (e.g. rel-11_0 for the current 11.0 series).
cd /optsudo git clone https://github.com/RotherOSS/otobo-docker.git --branch rel-11_0 /opt/otobo-dockercd /opt/otobo-dockerls -a # sanity check: README.md and the .docker_compose_env_* files should be presentStep 3: Create the .env file
Section titled “Step 3: Create the .env file”The .env file is the central configuration file for your OTOBO installation. It is not created automatically; instead you copy it from one of the provided sample files:
.docker_compose_env_http– OTOBO over HTTP (simplest option, e.g. behind your own reverse proxy).docker_compose_env_https– OTOBO over HTTPS with the built-in Nginx reverse proxy
For a simple HTTP installation:
sudo cp -p .docker_compose_env_http .envFor HTTPS, use .docker_compose_env_https instead and provide a certificate (see Advanced installation).
Step 4: Set the database root password
Section titled “Step 4: Set the database root password”Open the .env file and set a secure password for the database administrator:
sudo vi .envAdjust the following line:
OTOBO_DB_ROOT_PASSWORD=<your_secure_password>You will need this password later in the web installer to create the database and the OTOBO schema.
Step 5: Start the containers
Section titled “Step 5: Start the containers”Start the whole stack in the background:
sudo docker compose up --detachOn first start the Docker images are downloaded from Docker Hub – depending on your connection this can take a few minutes.
Then verify that all services are running (five for HTTP, six for HTTPS):
sudo docker compose psStep 6: Complete the installation via the web installer
Section titled “Step 6: Complete the installation via the web installer”Open the OTOBO installer in your browser:
http://<your-server-ip>/otobo/installer.plFollow the installer steps and note the following:
- Choose a new MySQL/MariaDB database.
- As the database root password, use the value from
OTOBO_DB_ROOT_PASSWORD. - Leave the MySQL hostname set to
db– this is the internal service name of the database container.
When finished you can log in to the agent interface (default user root@localhost; the password is shown at the end of the installer).
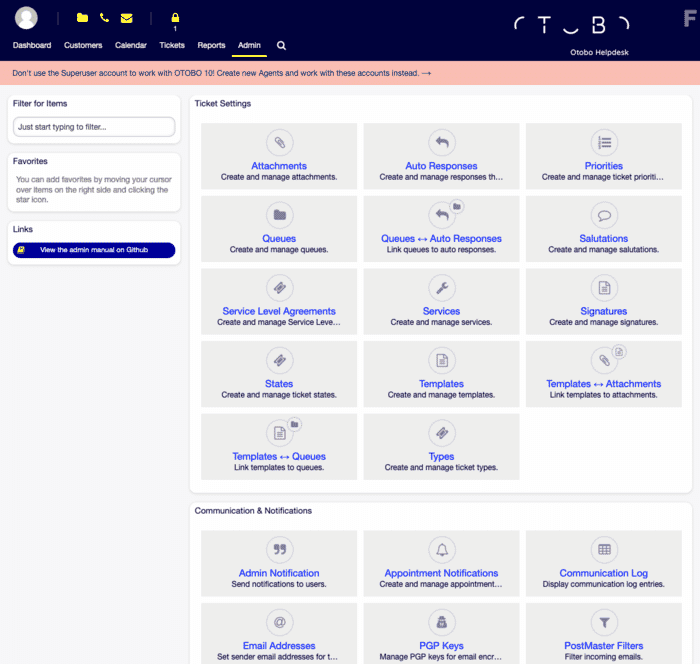
After the installation
Section titled “After the installation”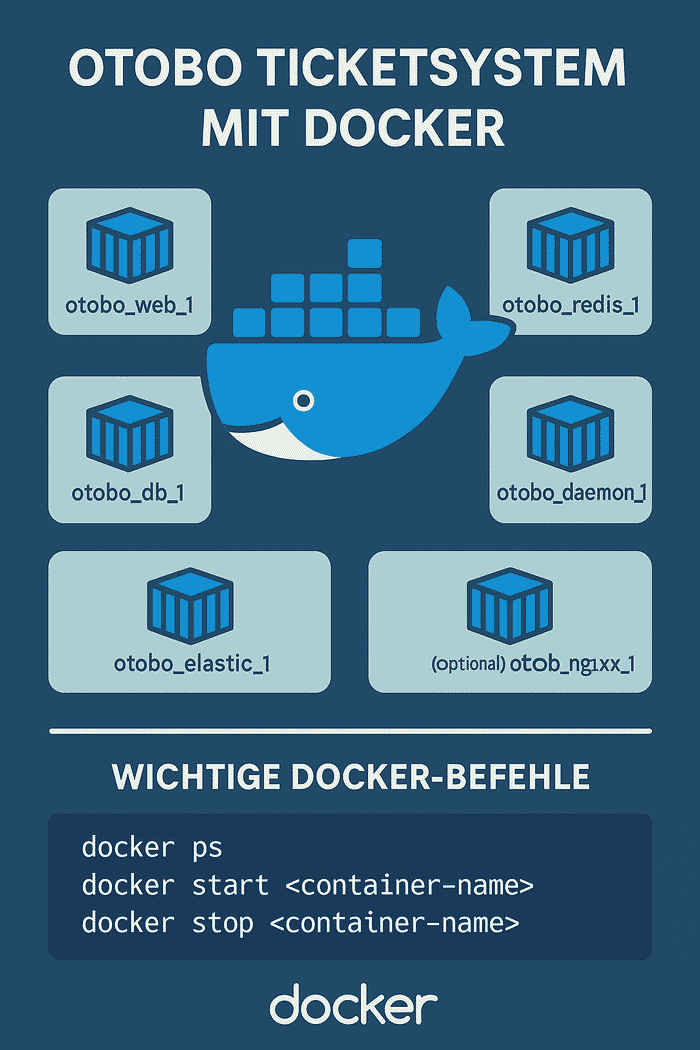
- Check the OTOBO daemon: the daemon container handles background tasks (email fetching, escalations, cron jobs). It runs as its own container and should be shown as “running”.
- Firewall: open the required ports. With
firewalld:
sudo firewall-cmd --permanent --add-service=httpsudo firewall-cmd --permanent --add-service=httpssudo firewall-cmd --reload- Enter the container (for CLI tasks):
sudo docker compose exec web bashTroubleshooting
Section titled “Troubleshooting”Elasticsearch does not start / the container exits immediately
Elasticsearch requires an increased vm.max_map_count value. Set it permanently:
sudo sysctl -w vm.max_map_count=262144echo "vm.max_map_count=262144" | sudo tee /etc/sysctl.d/99-otobo-elasticsearch.confSELinux blocks container access
RHEL ships with SELinux enabled by default. If containers show access issues, check the audit logs (sudo ausearch -m avc -ts recent). If needed, set an appropriate SELinux boolean or temporarily switch to permissive mode for diagnosis (sudo setenforce 0).
Port 80 or 443 already in use
Set different ports in the .env file via OTOBO_WEB_HTTP_PORT or OTOBO_WEB_HTTPS_PORT and restart the stack.
View the logs of a service
sudo docker compose logs -f websudo docker compose logs -f elasticFurther topics
Section titled “Further topics”For HTTPS configuration, Nginx customization, environment variables, updates and backups, read the Advanced installation of OTOBO.
If you want to combine OTOBO with AI-powered ticket classification, see OTOBO AI & Open Ticket AI.
Frequently asked questions
Which RHEL versions are supported for OTOBO?
OTOBO supports RHEL 7 and newer (for example RHEL 8 and 9) using Docker and Docker Compose. On RHEL, Docker is installed from the official Docker CE repository (the `docker` package from the standard repos is outdated or unavailable). First set up the repository: Then install Docker Engine, the CLI and the…
Do I need EPEL to install Docker on RHEL?
Yes. Enable the EPEL repository, then install Docker, Docker Compose, and Git with yum before cloning otobo-docker.
Is the RHEL install path the same as CentOS?
Yes. Both use yum/EPEL for Docker packages and the same official Docker Compose stack for OTOBO. On RHEL, Docker is installed from the official Docker CE repository (the `docker` package from the standard repos is outdated or unavailable). First set up the repository: Then install Docker Engine, the CLI and the…
What should I know about System requirements?
[!NOTE] Elasticsearch is part of the stack and requires a fair amount of memory. For production environments, plan for at least 8 GB of RAM.
What should I know about Step 3: Create the `.env` file?
The `.env` file is the central configuration file for your OTOBO installation. It is not created automatically; instead you copy it from one of the provided sample files: `.docker_compose_env_http` – OTOBO over HTTP (simplest option, e.g. behind your own reverse proxy) `.docker_compose_env_https`…